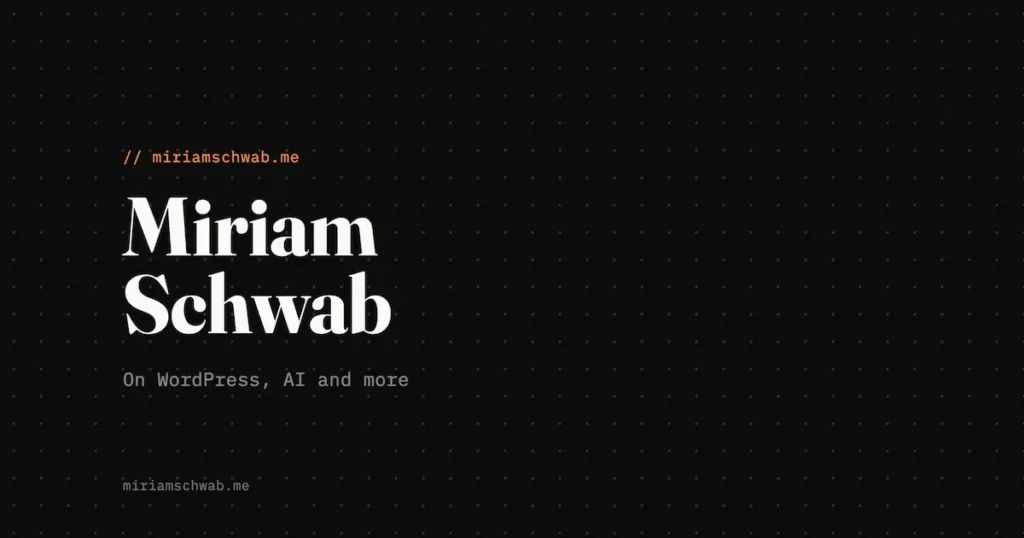
I needed a default social sharing image for my site that would be displayed when sharing my posts on social media like Twitter. I asked Claude to see what it could come up with since I didn’t want to spend too much time on this.
It came up with the idea of creating something that matched my website’s aesthetics and produced a few options using my site’s exact colors, fonts, and dot-grid background pattern. I uploaded it to the Site Settings in Yoast, and I was done.
What was cool about this graphic was that Claude generated it as HTML! It’s not the first time Claude took this approach for me, and I was curious about it, so I looked into it further so I could document it for future reference.
Where AI generated HTML graphics fit in
Claude isn’t going to replace Nano Banana or Midjourney for photorealistic images, but it is really good for the category of graphics that are really design problems rather than illustration problems. Here are some examples:
Social sharing cards and OG images. Like my above example, give it your brand colors, fonts, and what you want the card to say, and it will produce something clean and relevant.
One tip worth knowing: if Claude gives you a raw .svg file, open it in Chrome first and you’ll likely find the content squeezed into a corner with a lot of blank space around it. Ask Claude to wrap it in an HTML file instead — that gives the browser a proper fixed-dimension canvas to render against, and the DevTools screenshot will come out clean.
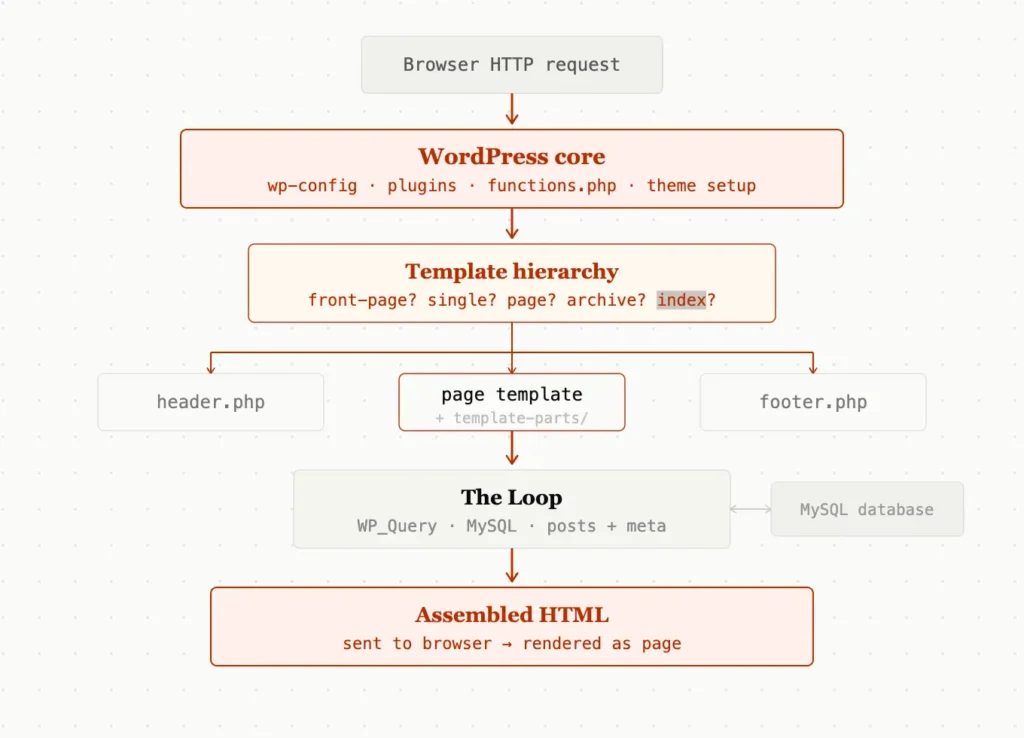
Diagrams and flowcharts. Process flows, architecture diagrams, how-something-works explanations. If you’re writing a technical post and want to illustrate a concept visually, Claude can build it.
Data visualizations. Charts, comparisons, timelines. Anything where you have structured data and want to make it easier to read.

UI mockups. Rough wireframes or more polished component mockups. Useful for planning a feature before building it, or for illustrating a tutorial. I used Claude for these types of mockups before building out this site in WordPress.
Interactive widgets. Claude can build small tools that actually work in the browser — calculators, sliders, configurators. These run as HTML. The below is a live example – click on any of the bars to get more info.
The common denominator is: Claude thinks like a designer who codes. It’s good at things that are precise, structured, and rule-based. It’s less suited for things that require organic artistic judgment or photographic realism.
How to prompt it
The more context you give, the better the result. A few things that help:
Give it your design system. Colors, fonts, visual details. If you have a brand guide or even just a list of hex values, paste them in. Claude will use them. In my case, Claude has knowledge and memory of my site’s palette, the fonts (Fraunces serif + IBM Plex Mono), and the dot-grid background, so it reproduced all of it accurately.
Describe the purpose, not just the content. “A social sharing card for my blog” gives Claude more to work with than “an image with my name on it.” It will make appropriate decisions about proportions, hierarchy, and layout when it understands what the thing is for.
Show it options first. Rather than asking Claude to produce one final graphic, ask it to show you a few variations. It’s easy for it to render multiple options side by side so you can pick a direction before it polishes anything.
Be specific about what you don’t want. If you hate a certain aesthetic, say so. “No gradients, no drop shadows, keep it flat and minimal” goes a long way.
Be prepared: the output is HTML
Here’s what’s cool about this process: when Claude creates graphics, it’s not generating image files. It’s writing HTML and CSS (and sometimes SVG). The output is a webpage that looks like a graphic.
This may not seem useful, but in some ways it’s a better approach because:
- You can ask Claude to tweak it and it will edit the code directly
- The text is crisp and pixel-perfect at any size
- You can open it in a browser and interact with it
And here’s the other cool thing I never knew: you can precisely screenshot HTML elements in your browser’s web tools to turn them into images!
How to screenshot HTML precisely in browser DevTools
Chrome’s DevTools has a built-in screenshot tool that captures exactly the content area of a page, at whatever dimensions you specify, without any browser UI (toolbar, tabs, etc.) in the shot. Here’s how:
- Open the HTML file in Chrome
- Open DevTools with Cmd+Option+I (Mac) or F12 (Windows)
- Click the device toolbar icon in the top-left of DevTools, or press Cmd+Shift+M — this switches the browser into responsive design mode
- In the toolbar that appears at the top of the page, set the width and height to exactly what you need. For a standard OG image that’s 1200 × 630
- Open the DevTools command palette with Cmd+Shift+P, type “screenshot”, and choose “Capture full size screenshot”. Another option is to mouseover the HTML element, right-click and select “Capture node screenshot”.
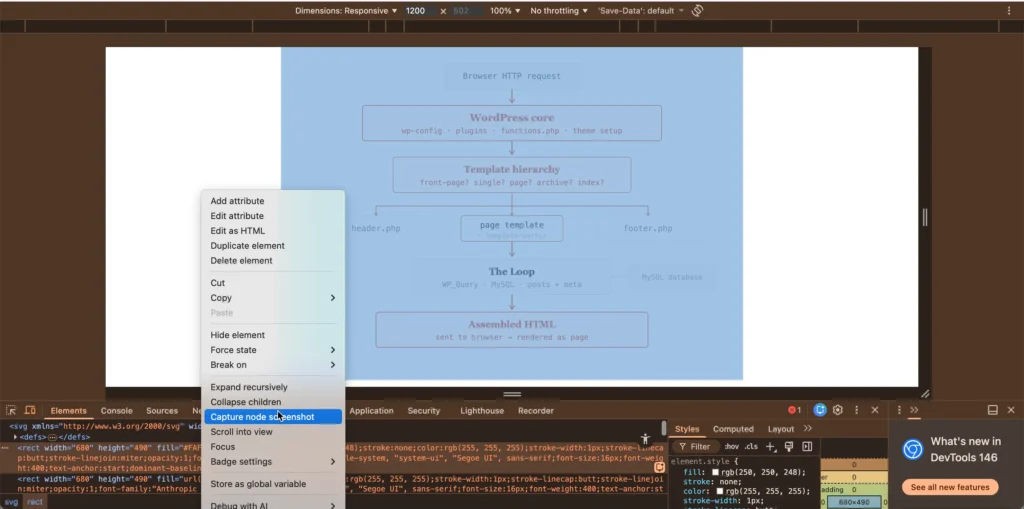
Chrome will download a PNG of exactly the content area at those dimensions. No crop needed, no browser chrome, no extra whitespace.
One tip: if your Mac or Windows display is HiDPI (Retina), the screenshot may come out at 2× resolution (2400×1260 for a 1200×630 canvas). That’s actually ideal for og:image — it will look sharp on high-res screens. If you need exactly 1200×630, you can set the DPR (device pixel ratio) field in the DevTools toolbar to 1.
Putting it together
The workflow I ended up with: describe what I want to Claude with enough brand context, ask for a few options, pick one, ask Claude to tweak anything, then download the HTML file, open it in Chrome, and take a DevTools screenshot. Total time was maybe 15 minutes including the back-and-forth.
I recommend you give it a try! Ask Claude for a social sharing card with your name, a short tagline, and your brand colors. See what comes back. From there it’s just iteration.